QuickTimePlayer is a great app for screen recording that comes pre-installed in the MacBook OS operating system that powers every Mac.
If you want to record screen activity on a MacBook, you no need to download any other software as MacBook already has a built-in app called QuickTimePlayer. This QuickTime video player app allows you to watch videos as well as allows you to do screen recording with audio. By using QuickTime Player you can also record a cropped / selected portion of your screen instead of entire screen. It quite easy and simple to use.
How to do Screen Recording in MacBook
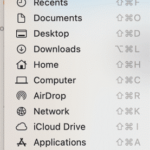
- First launch QuickTime Player from your Mac Applications folder or from any app launcher or from the Dock (or) ask Siri to open QuickTimePlayer.. After launching it.
- Just Go to QuickTimePlayer and to” file menu”.
- Now click on file and click on New Screen Recording and click on record button to record only your screen (without audio).
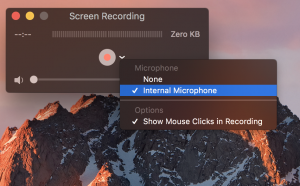
- To record AUDIO, Click on arrow showing next to record button and select internal micro phone from the pick list (see the picture below)
SEE ALSO : How to Use Multiple Desktops on a MacBook
- After clicking on the red Record button in this recording window, and yo’ll have two options: Click and drag across some portion of the screen you’d like to capture or click at anyplace on the screen to record the full screen. If you desire to record the full screen, the recording will start instantly. If you choose to record certain portion of your screen, you have to click the Start Recording button that shows later you state the plot to be recorded.
SEE ALSO : How To Protect Your MacBook Pro
- Now click record button to start screen recording along with audio. You are done.
- Enjoy your work. ALL THE BEST 🙂

